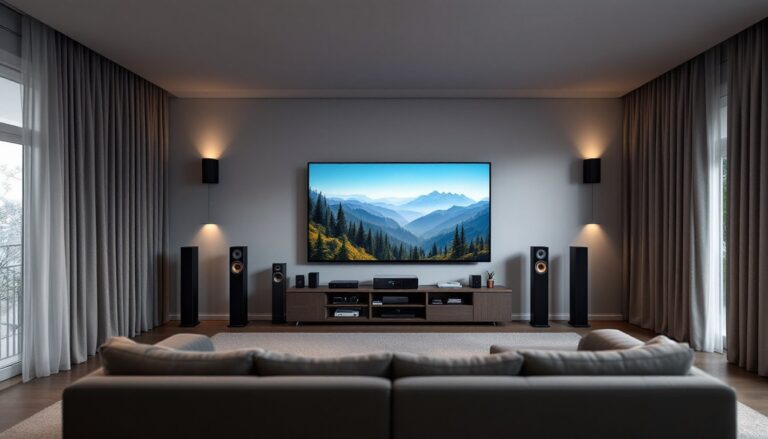

A 2.1 home theater system delivers surprisingly powerful sound and video quality without the complexity of a full 5.1 or 7.1 setup. Two front speakers and a subwoofer create an immersive cinematic experience that handles movies, music, and gaming with ease. Unlike expensive multi-speaker configurations, this approach gives you that theater feeling in a living room, bedroom, or basement without very costly or demanding professional installation. Whether you’re upgrading from built-in TV speakers or setting up your first dedicated audio setup, understanding the basics of a 2.1 system helps you make smart choices about gear, placement, and tuning.
Table of Contents
ToggleKey Takeaways
- A 2.1 home theater system delivers immersive cinematic sound at a fraction of the cost, with quality setups ranging from $300–$1,500 compared to $800+ for 5.1 configurations.
- Proper placement is essential: position front speakers at ear level with slight inward angles, keep them away from corners, and experiment with subwoofer location to find tight, even bass without boom.
- Set your receiver’s crossover frequency to 80 Hz initially—this tells speakers to stop handling low frequencies and hand them to the subwoofer for clean dialogue and powerful bass.
- A 2.1 system requires five core components: a video source, amplifier or receiver, two speakers, a powered subwoofer, and quality cables—powered subs simplify setup with a single RCA connection.
- Avoid common mistakes like skipping subwoofer calibration, undersizing your amplifier (aim for 50–80 watts per channel), and using flimsy speaker stands that color the sound.
- Room treatment like curtains, rugs, and soft furniture absorbs reflections and reduces bass boom—you don’t need expensive acoustic panels if your living space already has sound-absorbing elements.
What Makes a 2.1 System the Smart Choice for Home Theater
A 2.1 home theater system strikes the sweet spot between simplicity and performance. The two speakers (left and right channels) handle dialogue, music, and directional sound across the front soundstage. The subwoofer adds low frequencies, explosions, thunderstorms, bass lines, that small speakers simply can’t reproduce without distorting. This configuration works because most home theater content keeps action and dialogue centered in front of you: you don’t need surround channels to enjoy a film.
Cost is the obvious advantage. A quality 2.1 setup runs $300–$1,500 depending on speaker quality and subwoofer size, while 5.1 systems often start at $800 and climb much higher. You’re also looking at less cable runs, simpler amplification, and no need to run wires around the room or worry about speaker placement in corners where you don’t have sockets.
Space efficiency matters too. If your home theater lives in a bedroom, office, or compact living area, two bookshelf speakers and a compact subwoofer take up far less real estate than six or seven speakers scattered throughout the room. A 2.1 system doesn’t demand a dedicated theater room, it fits into life-sized homes.
Essential Components You’ll Need
A working 2.1 system needs five core pieces: a video source (Blu-ray player, streaming device, gaming console), an amplifier or receiver, two speakers, a subwoofer, and cables to tie it together.
Left and Right Speakers
Your front speakers are the workhorses. Bookshelf speakers (also called passive speakers) sit on stands or shelves and need an amplifier to power them. Powered speakers have an amp built in, simplifying the chain. For a 2.1 system, bookshelf speakers are the traditional choice because they’re affordable, flexible, and pair well with subwoofers.
When selecting speakers, look at frequency response (usually listed as “20 Hz–20 kHz” or similar). A flatter response across that range means cleaner dialogue and less colored sound. Speaker impedance (measured in ohms, typically 4 or 8) must match your amplifier’s output. An 8-ohm speaker works with most standard receivers: 4-ohm speakers demand more current and need an amp rated to handle them.
Size matters less than you’d think. A good 5-inch or 6-inch woofer in a bookshelf speaker handles midrange and dialogue better than many assume. Bigger drivers in tower speakers don’t automatically sound better, placement, enclosure design, and amplification count just as much.
Subwoofer Fundamentals
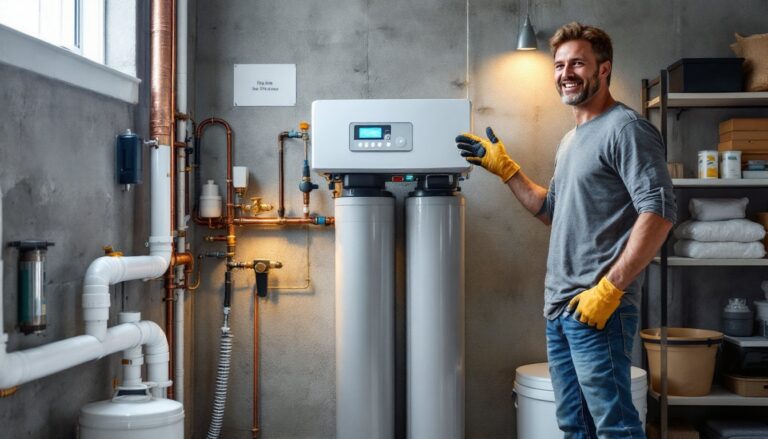
The subwoofer fills the gap below what your front speakers can handle cleanly. Most modern subwoofers are powered (they have a built-in amp), so you only need one line-level RCA connection from your receiver. This simplicity is why powered subs dominate home theater.
Subwoofer size is measured by woofer diameter, typically 8, 10, 12, or 15 inches. An 8-inch or 10-inch subwoofer works well for rooms up to 250 square feet and blends easily with bookshelf speakers. A 12-inch woofer suits medium rooms and delivers tighter bass control than larger drivers. 15-inch subwoofers are overkill for most living rooms and tend to boom unless your room and setup tune them out carefully.
Look for a sub with variable crossover control (usually a dial labeled 40–200 Hz). This lets you dial in where the subwoofer takes over from your main speakers, essential for smooth blending. A phase control switch or dial helps align the sub’s timing with your front speakers so bass doesn’t cancel out.
Amplifier power matters, but wattage alone isn’t the story. A 100-watt powered subwoofer with a sealed enclosure often plays louder and cleaner than a 300-watt ported sub with poor amplifier design. Read reviews and listen if possible before buying. Online research on subwoofer performance and reviews gives you real-world feedback on models in your price range.
Setup and Installation Tips for Your Space
Placement makes or breaks home theater sound. Your front speakers should sit at ear level when you’re seated, roughly 24–36 inches high. Angles matter: point them slightly inward so they focus sound toward the listening area, not at the walls. Angling inward by 15–30 degrees narrows the sweet spot a bit, but the directional focus pays off for dialogue clarity.
Keep speakers at least 3 feet away from corners if possible. Corners reinforce bass, which sounds boomy in nearby speakers. If walls are close, experiment with speaker position: even moving a speaker 2 feet away can tighten up the sound.
Subwoofer placement is trickier because bass frequencies bounce around rooms unpredictably. Start by placing the sub near your listening position (next to the couch or near your listening chair) and run test tones. Move it in 1–2 foot increments until you find a spot where bass sounds even and controlled, not boomy or thin. A corner placement often amplifies bass, which works if your room absorbs low frequencies well: hard walls and tile floors will turn a corner sub into a rumble machine.
Cables should be 14 AWG or heavier for speaker wire runs (the larger the gauge number, the thinner the wire, so 12 AWG is thicker than 14 AWG). Thin lamp cord creates resistive losses and muddy sound. RCA interconnects for subwoofer and component connections should be shielded to avoid hum and interference. Don’t cheap out here, quality cables cost $1–$2 per foot and make a noticeable difference.
Run cables away from AC power lines when possible to reduce hum pickup. If you must cross power and audio lines, do it at a right angle. Popular Mechanics tools and setup guides cover cable routing and behind-the-wall installation if you’re thinking about permanent runs.
Calibrating Your System for Best Performance
Calibration is where good systems become great ones. Start by setting your receiver’s speaker distances and levels. Most modern receivers have a microphone-based calibration system (Audyssey, YPAO, MCACC) that measures distances and tweaks levels. Run that first: it’s a solid starting point.
Manual tweaking comes next. Use test tones at 75 dB SPL (sound pressure level) measured at your listening position with a sound meter app on your phone. Set each speaker to the same level, starting with your fronts, then the subwoofer. The goal is balanced sound where no channel dominates.
Crossover frequency is critical. Set your receiver’s crossover (usually labeled “X-over” or “LPF”) to 80 Hz. This tells your speakers to stop playing low frequencies and hand them to the subwoofer. Smaller speakers (5–6 inch woofers) benefit from crossing at 100–120 Hz. Larger front speakers can cross lower at 60–80 Hz. Start at 80 Hz and adjust if dialogue sounds thin or boomy.
Subwoofer phase and level require patience. Sit in your main listening seat and have someone run a test tone through the sub. Flip the phase switch (or try 0° and 180°) and listen for which sounds tighter. If neither sounds right, dial the phase control slowly and listen for the point where bass tightens up. This alignment ensures the sub’s pressure waves reinforce rather than cancel your main speakers’ output.
Room treatment helps too. Heavy curtains, rugs, and soft furniture absorb sound reflections and reduce boom. Hard walls and tile floors bounce bass around and create uneven response. You don’t need acoustic panels, a couch, bookshelf, and decent curtains do most of the work. A Vizio V-Series 2.1 soundbar system offers an alternative if you want a more compact, all-in-one approach to 2.1 audio.
Common Mistakes and How to Avoid Them
Skipping the subwoofer crossover setup is mistake number one. A subwoofer running full range (crossover turned all the way up or off) will boom and mask dialogue. Set that crossover and take time to dial it in, it takes 15 minutes and transforms clarity.
Placing the subwoofer behind the listening area is another trap. Bass is omnidirectional at lower frequencies, so you can’t really “hide” a sub, but placing it far from listeners often creates a dead spot at the couch. Front placement or side placement works better in most rooms.
Undersizing the amplifier leads to distortion and listener fatigue. A receiver rated for 50 watts per channel at 8 ohms is fine for modest rooms, but 30 watts often sounds thin and strained at normal listening levels. Aim for at least 50–80 watts per channel if your speakers are bookshelf-sized.
Ignoring speaker stand quality is easily fixed. Flimsy stands vibrate, which colors the sound. Proper speaker stands are rigid and spike-decoupled from the floor. This costs $50–$150 per pair but pays off immediately.
Not letting components warm up means missing the system’s real sound. Receivers and speakers take 20–30 minutes to reach operating temperature. Cold circuits sound brighter and thinner. Always let things settle before critical listening or final calibration.
Acoustic treatment overkill is the flip side: don’t buy expensive panels for a living room where a couch and curtains already absorb sound well. Start with what you have, listen critically, then add treatment only if you hear obvious issues like boom or echo.
Avoid these pitfalls and your 2.1 system will deliver clean, powerful home theater sound that rivals setups twice the price.