
Setting up a home theater doesn’t require spending thousands of dollars or hiring a professional. With the right approach, any homeowner can create a dedicated entertainment space that rivals commercial cinemas. The key is understanding what equipment matters, planning your room layout strategically, and handling the installation yourself when possible. This guide walks you through everything from selecting displays and audio systems to optimizing acoustics and comfort, so you’ll know exactly where to start and what to prioritize for your home theater project.
Table of Contents
ToggleKey Takeaways
- Building a home theater on a budget is achievable by focusing on four core components—display, audio system, source device, and mounting hardware—rather than high-end specs you don’t need.
- Choose a room with few windows and doors (ideally slightly rectangular rather than long and narrow) and use soft materials like curtains and rugs to control acoustics without expensive panels.
- Display size should match viewing distance using the 1.5x screen width rule—a 65-inch TV works well for an 8-foot seating distance—and aim for at least 3,000 nits brightness if your room has natural light.
- Invest in proper mounting techniques and safety: use a stud finder to locate framing, install full-motion mounts rated for your TV’s weight, and never rely on drywall alone for structural support.
- Quality seating with lumbar support and dimmable lighting control are essential for comfort, and always run the receiver’s automatic calibration wizard to optimize audio performance in your room.
- Run speaker cables and HDMI through walls using conduit before finalizing furniture, and position your center speaker at roughly ear level for clear dialogue and proper home theater sound balance.
Essential Equipment You Need For a Home Theater
Your home theater foundation rests on four core components: a display, an audio system, a source device, and mounting hardware. Don’t get overwhelmed by specs, focus on what actually matters for your room size and budget.
Choosing the Right Display and Audio System
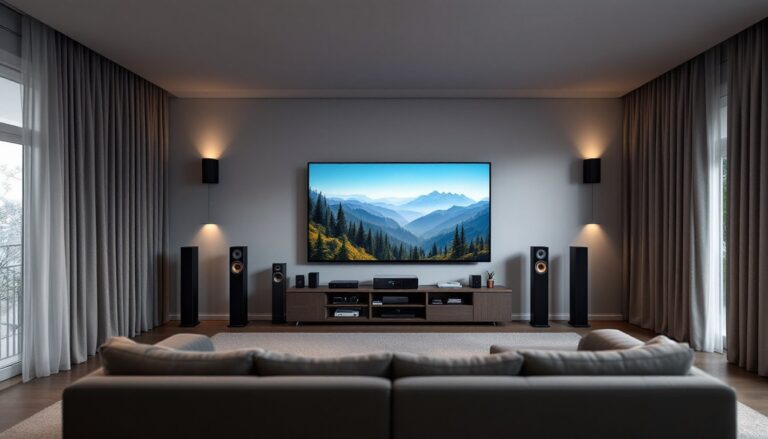
The display is your centerpiece. For most home theaters, a 4K television between 55 and 85 inches works well, depending on viewing distance. A general rule: sit at least 1.5 times the screen width away for comfortable viewing. If your couch is 8 feet from the wall, a 65-inch TV hits the sweet spot. Consider brightness ratings (measured in nits), aim for at least 3,000 nits if your room has windows or bright ambient light.
Audio quality often gets shortchanged, but it makes or breaks the experience. A quality soundbar with at least 5 speakers and Dolby Atmos support costs $400–$1,000 and handles most rooms well. If you want theater-grade sound, separate speakers (left, center, right, rear surrounds, and a subwoofer) deliver better dialogue clarity and immersion. Recent best home theater systems for 2026 cover surround sound setups and Dolby Atmos options in detail.
Your receiver or amplifier connects everything and handles audio processing. Look for models supporting Dolby Atmos and DTS:X for newer content. A mid-range receiver ($300–$600) gives you solid connectivity, room calibration tools, and upscaling for older media.
Source devices matter less than they once did. A quality streaming device (Apple TV, Nvidia Shield, or similar) handles 4K content and works with most audio formats. Physical media players are optional unless you’re committed to 4K Blu-ray discs.
Planning Your Space and Layout
Location and room design determine audio quality, viewing comfort, and whether your setup feels like a theater or just a TV in a bedroom.
Room Selection and Acoustic Considerations
Choose a room with few windows and doors, basements work great because they’re naturally dark and isolated from household noise. Avoid long, narrow rooms where sound bounces unpredictably. A roughly square or slightly rectangular space (12 feet wide by 14 feet deep) handles acoustics better than a 25-foot-long hallway.
Acoustics matter more than most DIYers realize. Hard surfaces (drywall, tile, glass) reflect sound and create echoes: soft materials (carpet, curtains, foam) absorb it. You don’t need expensive acoustic panels right away, start with heavy curtains or blackout drapes to reduce both light and echo. Thick area rugs dampen floor reflections. If you have a projector, mount it centrally on the ceiling to avoid keystoning (image distortion) and aim the lens slightly downward rather than horizontally.
Seating height matters too. Your center speaker (mounted under or above the display) should align roughly with ear level when seated. If eye level is 48 inches from the floor, aim for your speakers around 36–42 inches. Specific home theater design ideas include room layouts and seating arrangements that illustrate these principles.
Plan cable routes early. Run speaker wire and HDMI cables through walls (use conduit for easy replacement) or under-floor ducts before finalizing furniture placement. Leave slack, never pull cables tight.
Installation Tips For DIY Enthusiasts
Installation is where most home theater projects stumble. Prep work and careful placement beat rushing through mounting and wiring.
Mounting a display requires finding studs in your wall to support weight safely. A 65-inch TV weighs 80–100 pounds: undersizing your mount is a safety hazard. Use a stud finder to locate framing, then install a full-motion articulating mount rated for your TV’s weight (check the manual). Drill pilot holes slightly undersized, then drive lag bolts or heavy-duty anchors, never rely on drywall alone. Level the mount before securing the TV.
For projectors, in-ceiling mounts work best. Mark stud locations above your seating area using a stud finder and a level. A projector and mount together weigh 20–40 pounds, so verify your ceiling framing can handle it. If you hit rafters or trusses, excellent: if you need to mount between them, install blocking (2×6 lumber) between joists and bolt the mount to that.
Speaker placement is critical and doesn’t always require fancy brackets. Wall mounts work for surround speakers, aim for slightly above ear level at 90–110 degrees from center. A subwoofer can sit anywhere in the front half of the room: corner placement tends to boom, so experiment with placement 1–2 feet away from walls first. Use vibration isolation feet to decouple the sub from the floor.
Wiring: Run in-wall rated cables (marked CL2 or CL3) through studs and conduit. Avoid mixing power cables with audio lines to reduce interference. Label everything at both ends for troubleshooting later. Cable management looks professional and prevents damage.
Optimizing Comfort and Viewing Experience
A technical setup means nothing if you’re uncomfortable or can’t actually see the screen.
Reclining or quality seating is non-negotiable. Theater seating with lumbar support, cup holders, and recline functions ranges from $200–$800 per seat. Budget seats often have weak motors and fail within 2–3 years: mid-range options from established manufacturers last much longer. Arrange seating so everyone has a direct sightline to the screen, avoid rows deeper than 16 feet from the display.
Lighting control completes the experience. Install dimmable LED lights around the room at low levels for safety when lights are off. Avoid lights pointing directly at the screen. Smart lighting systems integrate with your receiver’s power-on sequence, automatically dimming when movies start. Budget $200–$400 for good dimmer switches and bulbs.
Climate control matters too. Home theaters run warm with all the equipment and closed doors. A small ductless mini-split AC unit ($1,500–$3,000 installed) keeps temperature comfortable during long sessions. Ensure adequate electrical outlets, plan for at least six outlets near your equipment, plus two for future expansion. Run a dedicated 20-amp circuit if your receiver and amplifiers draw heavy power.
Final tuning: Many receivers have calibration microphones that optimize sound for your room automatically. Run the setup wizard, follow the on-screen prompts, and place the mic at ear level in your main viewing seat. Don’t skip this, it’s worth an extra hour and dramatically improves audio quality. Expert tested home theater systems also highlight post-installation tuning as a critical step.
Conclusion
Building a home theater is a practical project that pays off every time you sit down to watch something. Start with a solid display and audio setup, choose your room carefully, and don’t rush installation. Proper mounting, wiring, and acoustic treatment make the difference between a nice TV corner and an actual theater. Plan ahead, measure twice, and take your time, the results speak for themselves.