
An outdoor home theater transforms a backyard into an entertainment destination, no subscription or ticket required. Whether it’s movie nights with family, watching the big game with neighbors, or hosting gatherings under the stars, a home outdoor theater delivers theater-quality experiences without the crowds or concession prices. The good news: building one doesn’t demand a contractor’s budget or advanced electrical credentials. With proper planning, standard equipment, and some elbow grease, a homeowner can set up a functional, weather-resistant outdoor theater in a weekend or two. This guide walks through the essentials: what to buy, where to put it, how to stay budget-conscious, and how to keep everything running through Arkansas seasons.
Table of Contents
ToggleKey Takeaways
- A well-planned outdoor home theater can be set up in a weekend or two without contractor expertise, using standard equipment and proper planning to deliver theater-quality experiences in your backyard.
- Choose outdoor-specific projectors with 3,000–5,000 lumens brightness and a fixed 100–120 inch screen ($200–$600) for superior image quality and durability compared to inflatable alternatives.
- Dedicated weatherproof speakers and properly routed audio cables are essential to overcome outdoor wind and ambient noise, with powered speakers being the most DIY-friendly option.
- Select a sheltered location on concrete or decking that faces away from sunset and streetlights, with dedicated electrical access via a 20-amp GFI outlet to ensure safety and prevent overloading.
- Stretch your budget by phasing the project, purchasing used projectors, building your own screen frame, and routing cables in conduit yourself—savings can reach 40–50% without sacrificing quality.
- Weatherproofing is critical for year-round enjoyment: protect the projector from rain, use UV-resistant screen material, apply IP65-rated outdoor connectors, and perform seasonal maintenance to extend your outdoor home theater’s lifespan to 10+ years.
Why Outdoor Home Theaters Are the Perfect Addition to Your Backyard
An outdoor home theater isn’t just a luxury, it’s a practical way to extend living space and boost property enjoyment. Unlike a dedicated media room locked indoors, an outdoor setup captures natural evening breeze, connects you to your landscape, and creates a gathering spot that naturally draws people together.
The financial case is solid too. A modest outdoor theater system costs less than a single vacation for a family of four, yet delivers entertainment value year-round. Resale appeal matters: homes with thoughtfully designed outdoor living areas consistently command higher prices and spend less time on the market.
Beyond economics, there’s the lifestyle angle. Kids remember movie nights under the stars more vividly than a Tuesday on the couch. Friends show up more readily when you host at home. And on a practical level, you control the environment, pause when you want, rewind without asking, and nobody’s checking their phone because the seats are uncomfortable. Outdoor home theaters succeed because they solve a real problem: the desire for shared experiences in your own space.
Essential Equipment and Technology You’ll Need
Projectors and Screens
A projector is the centerpiece of any outdoor theater. Outdoor projectors differ from indoor ones: they need higher brightness (measured in lumens) to overcome ambient light and daylight. Aim for a minimum of 3,000 to 5,000 lumens for evening viewing: darker backyards can use 3,000 lumens, while properties with nearby street lighting or dusk screening need 5,000 or more.
Throw distance matters too. If your mounting surface is 15 feet from the projection point, check the projector’s throw ratio to ensure it fills your screen appropriately. Look for models with keystone correction (adjusts image skew if the projector isn’t perfectly level) and lens shift (moves the image without rotating the whole unit). Budget $400–$1,200 for a solid entry-level outdoor projector: premium models run higher but aren’t required for backyard use.
Screens come in two flavors: fixed and inflatable. Fixed screens mount permanently to a structure, a fence, frame, or building wall, and offer superior image quality and durability. A 100–120 inch fixed screen costs $200–$600 and lasts years with minimal maintenance. Inflatable screens are portable and quick to set up, but they catch wind, require constant inflation, and degrade faster in UV exposure. For a permanent backyard installation, fixed is the smart choice.
Audio Systems and Speakers
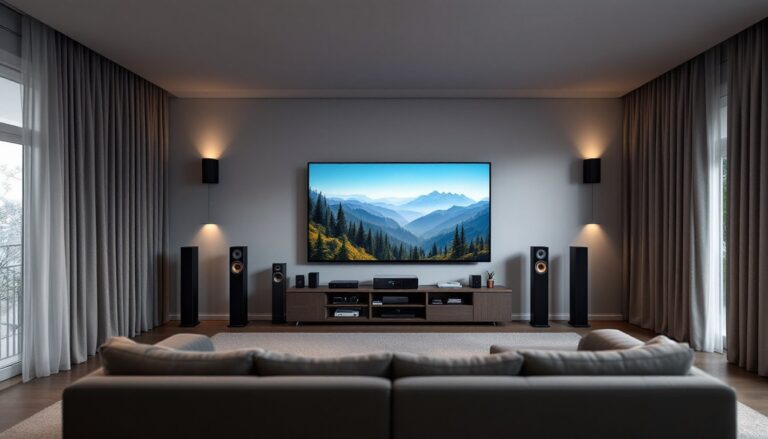
Good sound matters more than people expect. A projector’s built-in speaker is usually tinny and weak: outdoor distances swallow treble, and you’ll fight wind and ambient noise. Install dedicated outdoor speakers designed to weather the elements.
Weatherproof passive speakers require an amplifier and tend toward deeper mounting requirements, but they sound warm and natural. Active/powered outdoor speakers have built-in amplifiers and just need a power source and audio input. Powered speakers are easier for DIYers: typical setups use a pair of front speakers (one to each side of the screen) flanking a center speaker, plus rear surrounds if space allows. Plan on $100–$400 per speaker depending on size and quality.
Run audio cables in conduit or buried cable runs to protect them from foot traffic and weather. Use outdoor-rated connectors and avoid unshielded runs near electrical circuits. A wireless Bluetooth connection from a phone or streaming device works for casual viewing, but a wired source (HDMI from a media player or cable box) gives you more reliable performance and eliminates latency issues during sports or games.
Choosing the Right Location and Setting Up Your Space
Location determines whether your outdoor theater becomes a cherished gathering spot or a bug-bitten hassle. Start by identifying sightlines: everyone should see the screen clearly from seating areas without neck strain. Face the screen away from direct sunset or nearby streetlights: screening with trees or a pergola helps manage glare and ambient light.
Check for wind exposure. Gusty corners of a yard are poor choices: sheltered areas (near a building or hedgerow) are better. Wind degrades audio quality and rocks inflatable screens, so a protected pocket is worth planning around.
Ground conditions matter for durability and safety. A concrete patio or decking is ideal for seating and equipment, it stays level, drains well, and won’t become muddy after rain. Grass works but tends to kill viewing comfort after an hour of sitting. Crushed stone or mulch is a compromise, though it tracks into shoes and shifts over time.
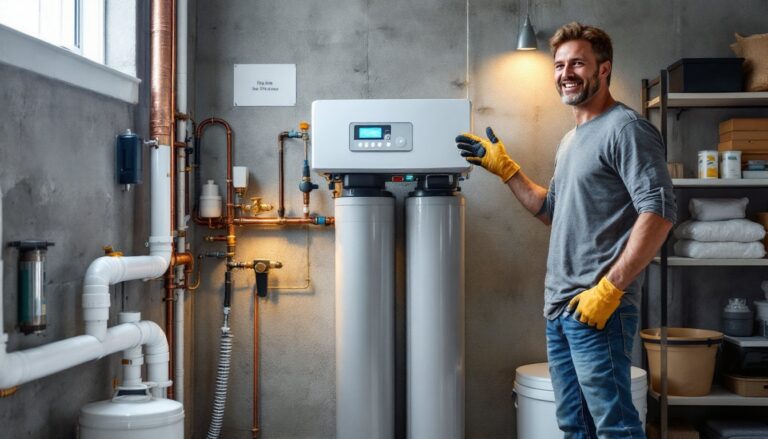
Ensure electrical access. Run a dedicated outdoor circuit (ideally 20-amp, rated for damp locations per National Electrical Code standards) to a weatherproof outlet near the projector and amplifier. This prevents overloading a kitchen circuit and ensures safety. If running more than 50 feet, consult an electrician: voltage drop becomes a real issue beyond that distance. Install a GFI (ground-fault interrupting) outlet to protect against moisture-related shocks, code requires it for outdoor circuits in most jurisdictions.
Structural setup depends on equipment. A projector needs secure mounting on a post, pergola rafter, or wall bracket at roughly 8–10 feet high to clear heads and avoid keystoning issues. The screen mounts to a sturdy frame: check its wind rating. Use outdoor-grade fasteners (stainless steel or galvanized) to prevent rust and corrosion.
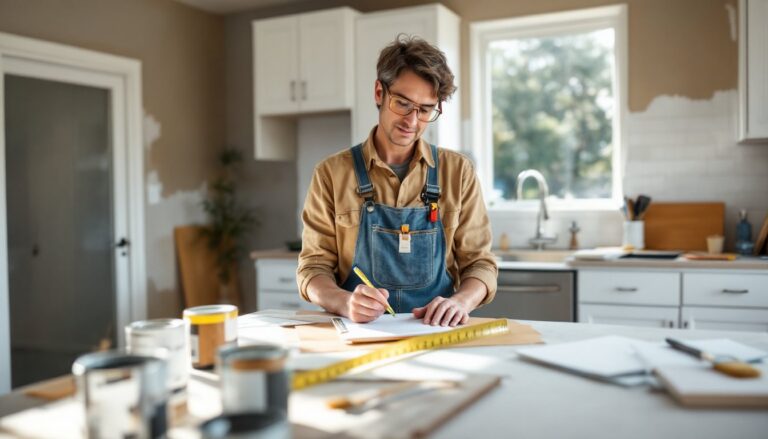
Budget-Friendly Tips for DIY Installation
Stretching your budget without sacrificing quality comes down to smart choices and patient work. Start by phasing the project. A projector and screen might cost $1,000–$2,000, but audio and seating can wait a month or two. This spreads costs and lets you prioritize must-haves.
Buy used equipment where it makes sense. Projectors hold value but older models still work well for backyard duty: a five-year-old projector at 60% of retail often outperforms brand-new budget projectors. Check eBay, Facebook Marketplace, and AV forums for deals. Avoid used screens if they’re stored poorly (UV degradation is permanent), but used mounting hardware and cable runs are fair game.
Build your own frame instead of buying a pre-made screen frame kit. A simple frame uses 2×4 lumber, lag bolts, and a plywood backing. A 100-inch diagonal screen is roughly 87 inches wide and 49 inches tall: build accordingly and cover the frame with screen material (available from projector retailers). The labor is weekend-friendly, and savings run 40–50% versus prefab frames.
DIY cable routing saves money and looks professional. Conduit costs about $0.50 per foot: buying pre-assembled outdoor cable kits runs three times that. Bury electrical in schedule-40 PVC conduit at least 12 inches deep (per NEC code in most areas) and audio cable in flexible conduit above ground. Trenching takes time but prevents tripping hazards and protects your investment. Sourcing your own cable, connectors, and fittings, rather than buying bundled kits, cuts costs without cutting quality. Sites like HGTV and Southern Living showcase dozens of budget-conscious outdoor entertainment projects that prove you don’t need contractors or curated retailers.
Weatherproofing and Maintenance for Year-Round Enjoyment
Arkansas weather, summer heat, spring thunderstorms, and occasional ice, demands respect. Weatherproofing isn’t optional: it’s the difference between a system lasting 5 years and 15.
Start with the projector. Most outdoor projectors handle moderate moisture, but direct water ingress kills them fast. Mount the projector under cover: a small roof eave, pergola overhang, or dedicated weatherproof box. Never leave it exposed to rain. Lens caps and dust covers ($15–$30) protect optics from dust and debris: use them whenever the system sits idle for more than a day.
Screens need UV-protective fabric. Quality outdoor screen material resists fading and mildew: cheap material becomes brittle and discolored within two seasons. Inspect the screen monthly for tears, and patch small holes immediately with screen repair tape before moisture wicks in. If your screen isn’t covered by a roof, a retractable awning or removable cover shields it during off-season months.
Cables and connectors corrode in humidity. Outdoor-rated connectors (rated IP65 or better) resist water ingress. Seal connection points with silicone or weatherproof tape. Conduit protects buried runs, but check for standing water in trenches after heavy rain and install drain holes at low points.
Audio speakers rated for outdoor use already handle moisture, but annual inspection prevents surprises. Check for cracks in enclosures, test connections for corrosion, and reapply weatherproof sealant to any exposed wood or metal annually.
Electrical outlets need GFCI protection year-round and a weatherproof cover even when nothing’s plugged in, rain doesn’t ask permission. Inspect the breaker serving your outdoor circuit monthly: a tripped breaker after a rainstorm signals a leak or ground fault that an electrician should diagnose.
Seasonal shutdown: before winter, drain water from conduit runs, disconnect equipment, store batteries from wireless remotes, and cover fixed installations. In spring, inspect everything for moisture damage, test circuits, and replace any corroded fasteners with stainless hardware. Regular attention prevents expensive repairs and extends equipment life to a decade or more. The same care that keeps a tiny open-air theater in Norway functional through harsh Nordic winters will keep your Arkansas backyard theater thriving.